Easy Christmas Ornament Coasters: Free Crochet Pattern
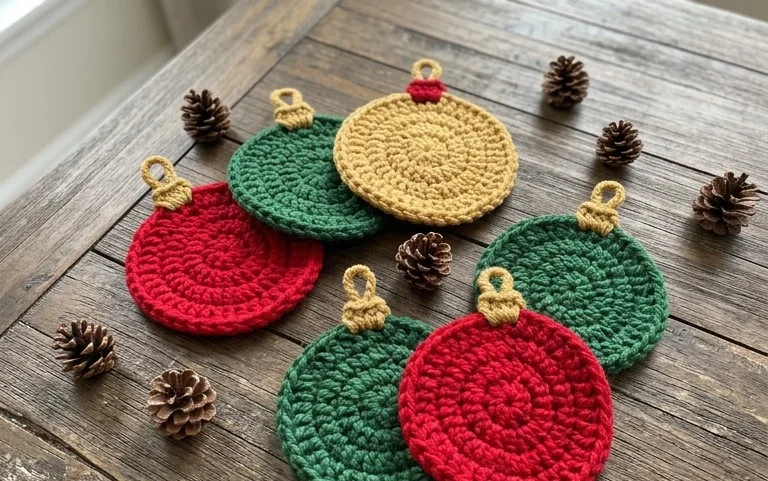
These round crochet coasters bring a festive touch to your coffee table while providing a sturdy surface for warm mugs during the holiday season. The finished pieces feel dense and substantial in your hand, offering a clean, modern aesthetic that fits right in with seasonal decor. Whether you are a beginner looking for a manageable project or someone wanting to clear out a basket of leftover cotton yarn, these circular mats offer a satisfying rhythm of stitches. You will learn how to work in continuous rounds, which allows for a smooth, spiral texture that stays flat on any wooden surface.
Why You’ll Love This Pattern
This beginner-friendly crochet coaster pattern provides a practical way to protect your furniture while practicing fundamental stitch techniques. The design relies on the single crochet stitch worked in a continuous spiral, which removes the need for joining rounds and creates a smooth, seamless surface. Because each coaster requires only a small amount of yarn, it serves as an efficient project for using up leftover bits from previous knitting or crochet tasks. You can complete a full set of four in a single afternoon, making these an ideal choice for last-minute housewarming gifts or quick market inventory.
I was able to whip up a set of these for my dining table in just a couple of hours. The instructions were easy to follow and the final result lays perfectly flat without any curling.
— Sarah, home decor enthusiast
Pattern Overview & Skill Level
- Skill Level: Beginner
- Approximate Time: 30 minutes per coaster
- Construction: Working in continuous rounds starting with a magic ring
- Finished Dimensions: Approximately 4 inches in diameter
Materials & Supplies Needed
- Yarn: Worsted weight (#4) cotton yarn. Cotton is preferred for its heat resistance and absorbency. You will need approximately 15 yards per coaster.
- Hook Size: 5.0 mm (H-8) crochet hook.
- Notions: Tapestry needle for weaving ends, stitch marker to track the beginning of your rounds.
- Yarn Substitutions: Acrylic yarn can be used, though it is less absorbent than cotton. Using a thinner yarn with a smaller hook will result in a smaller coaster, while a bulkier yarn will increase the finished size significantly.
Stitch Guide & Abbreviations (US Terms)
- MR: Magic Ring. A technique to start rounds by crocheting over a loop of yarn.
- ch: Chain stitch.
- sc: Single crochet. Insert hook into stitch, yarn over, pull up a loop, yarn over, pull through both loops on hook.
- inc: Increase. Work 2 sc into the same stitch.
- sl st: Slip stitch. Insert hook into stitch, yarn over, pull through stitch and loop on hook.
- st: Stitch or stitches.
Step-by-Step Pattern Instructions
Coaster Body
- Rnd 1: Work 6 sc into a magic ring. Pull the tail tight to close the center (6 sts).
- Rnd 2: Work 2 sc in each st around (12 sts).
- Rnd 3: 1 sc in next st, inc in next st repeat from * to * 6 times (18 sts).
- Rnd 4: 1 sc in next 2 sts, inc in next st repeat from * to * 6 times (24 sts).
- Rnd 5: 1 sc in next 3 sts, inc in next st repeat from * to * 6 times (30 sts).
- Rnd 6: 1 sc in next 4 sts, inc in next st repeat from * to * 6 times (36 sts).
- Rnd 7: 1 sc in next 5 sts, inc in next st repeat from * to * 6 times (42 sts).
Finishing
After completing Round 7, work one slip stitch into the next stitch to smooth out the edge. Cut the yarn, leaving a 6-inch tail. Pull the tail through the final loop. Use your tapestry needle to weave the end through the back of the stitches, securing the yarn firmly. Trim the excess yarn close to the fabric to ensure the coaster lays flat.
Care & Washing Instructions
- Hand wash your coasters in cool water with mild soap to preserve the shape of the cotton fibers.
- Lay the coasters flat on a clean towel to air dry, ensuring they are positioned in a perfect circle.
- If the coasters become warped from use, lightly steam them with an iron held a few inches above the surface and pat them into a flat shape.
Pro Tips & Common Mistakes to Avoid
Maintain consistent tension throughout the rounds to ensure the coaster does not ruffle or cup. If you notice the work beginning to curve upward like a bowl, your tension may be too tight; if it begins to ripple like a wavy edge, your tension is likely too loose. Always use a stitch marker at the start of each round, as working in a continuous spiral makes it easy to lose track of where one round ends and the next begins. When weaving in your ends, run the needle through the center of the stitches on the back side rather than between them to keep the finish invisible.
Frequently Asked Questions
Can I make these coasters larger?
Yes, you can increase the size by continuing the growth pattern. In Round 8, work 1 sc in next 6 sts, inc in next st around. Continue adding 6 stitches per round until you reach your desired diameter.
Is it okay to use wool for these coasters?
While you can use wool, it is not recommended for items that will hold cold, sweating glasses or hot mugs, as wool can felt when exposed to moisture and heat, making it difficult to wash.
Why does my circle look like a hexagon?
This often happens when increases are stacked directly on top of each other in every round. To avoid this, you can rotate the position of your increases slightly in each round to distribute them more evenly.
Am I allowed to sell coasters made from this pattern?
You are welcome to sell finished items made from this pattern, provided you credit the design. Please do not redistribute or sell the written pattern itself.
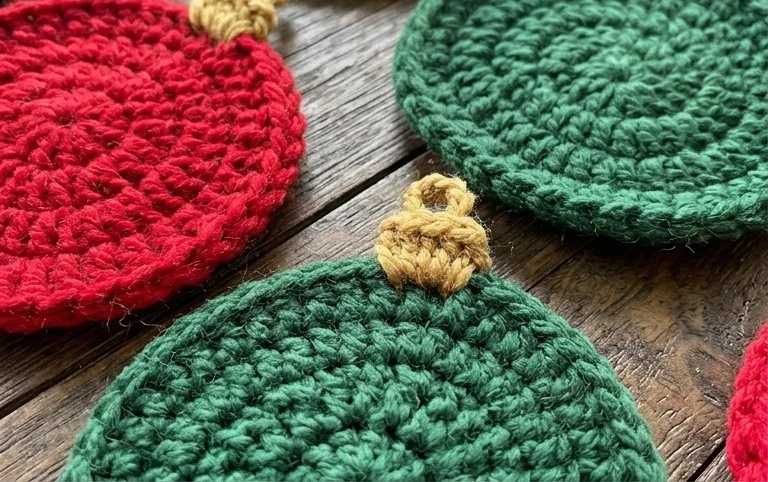
Your finished coaster set adds a cozy, handmade touch to your holiday table setup that guests will certainly appreciate during a morning coffee or an evening cider. You might consider using a metallic silver or gold thread held alongside your cotton yarn for an extra hint of festive sparkle in your next batch. I enjoy seeing how different color combinations turn out, so please share a photo of your work on your favorite social media site. Feel free to browse through the rest of the blog for more seasonal projects.