Easy Net Stitch Crochet Pattern: Step-by-Step Tutorial
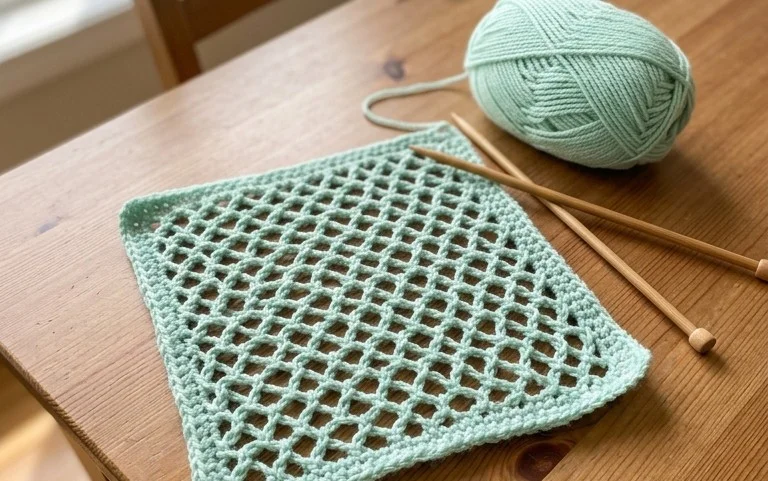
This net stitch project results in a fabric that feels light, airy, and surprisingly flexible against the skin, making it a favorite for market bags or summer accessories. Whether you are a beginner looking to expand your skills or a maker seeking a quick weekend win, you will enjoy how the open gaps create a classic, geometric texture. You will learn to manipulate basic yarn overs and chain spaces to build a consistent grid that holds its shape without becoming heavy. It is a rewarding project that relies on simple, rhythmic movements to create a functional and stylish final piece.
Why You’ll Love This Pattern
This simple crochet drawstring pouch uses a sturdy single crochet base that keeps its shape even when filled with small treasures like stitch markers, coins, or lip balm. The construction relies on a classic circular bottom worked in continuous rounds, transitioning into a tall cylinder that creates a natural, structured opening. Because the stitch pattern is uniform, it is an ideal project for practicing tension control without the distraction of complex color changes or texture shifts. Most crafters finish this project in a single evening, making it a reliable choice for quick gifts or markets.
I managed to finish this pouch during a weekend trip and found the instructions incredibly easy to follow compared to other bag patterns I have tried before.
— Sarah, hobbyist crocheter
Pattern Overview & Skill Level
- Skill Level: Beginner
- Approximate Time: 2 to 3 hours
- Construction: Worked in continuous rounds from the bottom up, with a final round for the drawstring eyelets
- Finished Dimensions: 4 inches wide by 5 inches tall when laid flat
Materials & Supplies Needed
- Yarn: Worsted weight (#4) cotton yarn, approximately 60 yards. Cotton provides the necessary structure for a pouch.
- Hook Size: 4.5 mm (US 7) to ensure tight stitches that prevent contents from falling out.
- Notions: Tapestry needle for weaving in ends, a locking stitch marker to track the start of rounds, and 15 inches of thin cord or braided yarn for the drawstring.
- Yarn Substitutions: Acrylic yarn is a soft alternative, but it may stretch more than cotton under the weight of items. Avoid bulky or roving yarns as they will make the drawstring channel too thick to cinch properly.
Stitch Guide & Abbreviations (US Terms)
- ch = chain
- sc = single crochet
- inc = 2 sc in same stitch
- st/sts = stitch/stitches
- sl st = slip stitch
- YO = yarn over
- dc = double crochet
- sk = skip
- Rnd = round
Step-by-Step Pattern Instructions
Pouch Body
The base is worked in a flat circle, increasing every round to keep it laying smooth.
- Rnd 1: 6 sc into a magic ring. Place stitch marker in the last st. (6 sts)
- Rnd 2: 2 sc in each st around. (12 sts)
- Rnd 3: [1 sc in next st, inc] 6 times. (18 sts)
- Rnd 4: [1 sc in next 2 sts, inc] 6 times. (24 sts)
- Rnd 5: [1 sc in next 3 sts, inc] 6 times. (30 sts)
- Rnd 6: [1 sc in next 4 sts, inc] 6 times. (36 sts)
- Rnd 7: Work in BLO (back loop only) for this round. 1 sc in each st around. (36 sts)
- Rnd 8-20: Work in both loops. 1 sc in each st around. (36 sts)
Drawstring Channel
This section creates the holes needed to thread your cord.
- Rnd 21: [ch 2, sk 2, 1 sc in next 4 sts] 6 times. (36 sts including chains)
- Rnd 22: 1 sc in each st and 2 sc in each ch-2 space around. (36 sts)
- Rnd 23: Sl st in each st around to create a clean, sturdy edge. Fasten off and weave in ends. (36 sts)
Assembly
Cut your 15-inch length of cord. Using your tapestry needle or fingers, weave the cord in and out through the spaces created in Rnd 21. Knot the ends of the cord together to prevent it from sliding out of the channel. Pull the ends to cinch the bag closed.
Care & Washing Instructions
- Hand wash your pouch in cool water with a mild detergent to prevent the cotton from losing its color.
- Lay the item flat on a dry towel to air dry, reshaping it into a perfect cylinder while damp.
- Avoid using a tumble dryer, as heat can shrink cotton fibers and distort the shape of the circular base.
Pro Tips & Common Mistakes to Avoid
Maintain consistent tension by holding the yarn snugly; if your stitches are too loose, the holes in the bag will allow small items like coins to slip through. Always move your stitch marker at the end of every round so you do not lose track of your starting point, as counting stitches in continuous rounds can be difficult. Weave your ends under the stitches on the inside of the pouch for at least one inch to ensure they stay secure during repeated opening and closing. If you choose to resize the bag, remember that adding more rounds to the base increases the width, but you will need significantly more yarn to maintain the height-to-width ratio.
Frequently Asked Questions
Can I use a larger hook to make the bag faster?
Using a larger hook will make the fabric looser and potentially gappy. It is better to stick to the recommended hook size to ensure the pouch remains functional for storing small items.
How do I adjust the size of the pouch?
You can increase the size by adding more increase rounds to the base (e.g., [1 sc in next 5 sts, inc]). For every increase round added to the base, add 6 stitches to your count for the wall rounds.
Is this pattern suitable for complete beginners?
Yes, this pattern only requires single crochet stitches and basic increases. It is a great way to practice working in the round without having to manage complex shaping.
Am I allowed to sell pouches made from this pattern?
You are welcome to sell finished items you create yourself, but please credit the design when listing your products online or at craft fairs.
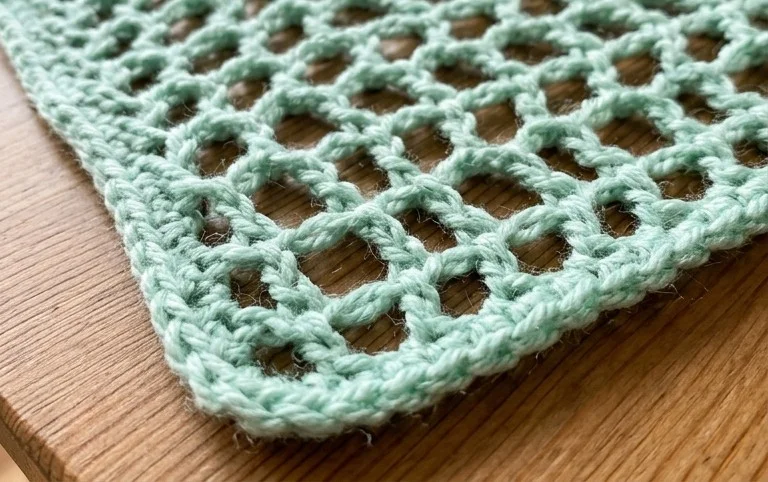
Your finished net stitch piece provides a wonderful, airy texture that is ready to hold groceries or everyday essentials. You might consider using a mercerized cotton for a smoother finish or working the pattern in two different colors to make the mesh geometry pop. Please share a photo of your project on Pinterest to show how your color choices turned out. Feel free to explore more of our free patterns on the blog to find your next creative project after you finish this one.