Summer Granny Square Tank Top: Easy Step-by-Step Pattern
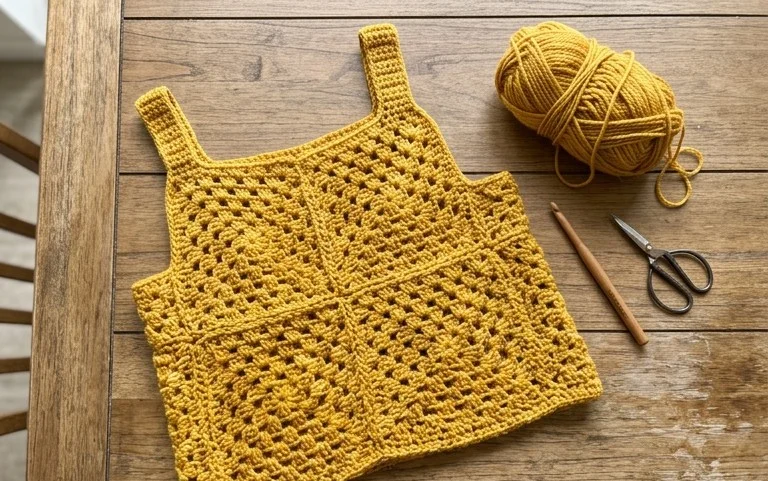
This tank top creates a breezy silhouette that sits lightly against the skin, making it a reliable staple for warm weather afternoons. You assemble the garment using individual squares that mimic the traditional style seen in handmade blankets, providing a rhythmic and meditative stitching experience that appeals to those who enjoy building a project one piece at a time. Whether you have stacks of leftover cotton yarn waiting for a purpose or you want to practice your tension, these components fit together to form a breathable layer. You will learn the mechanics of the classic double crochet cluster and how to join your finished squares into a wearable shape, providing you with a finished garment that feels custom-made from the very first stitch.
Why You Will Love This Pattern
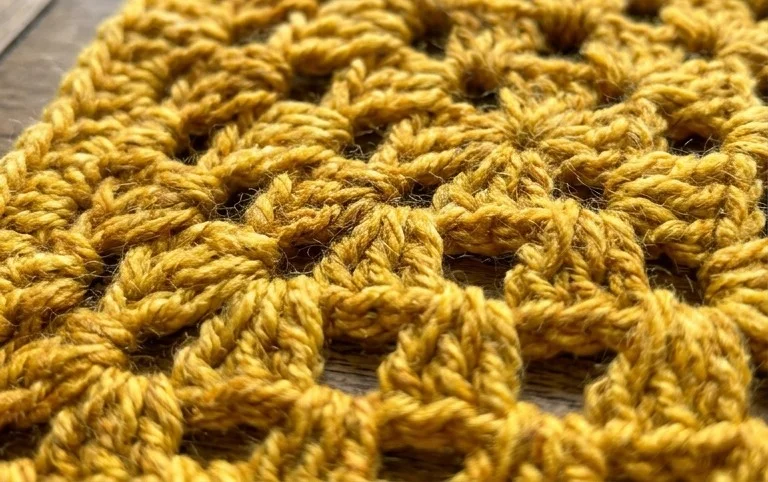
The Classic Crochet Granny Square is the fundamental building block of modern crochet. This pattern relies on a simple, rhythmic repetition of double crochet clusters that creates a structured, lightweight fabric perfect for blankets, cardigans, or decorative pillows. Because it is worked in rounds from the center outward, you can easily control the size of your final piece by simply adding more rounds. It is an ideal project for using up partial skeins of leftover yarn, allowing you to experiment with bold color combinations without needing to commit to a single large supply of one color. The construction is forgiving, making it a stress-free project for those evenings when you want to keep your hands busy while relaxing.
I finally learned how to make a perfect flat square after struggling with other tutorials for weeks. This pattern is clear and the stitch counts are easy to keep track of even when I am watching television.
— Sarah, hobbyist crocheter
Pattern Overview & Skill Level
- Skill Level: Beginner
- Approximate Time: 30 to 45 minutes per square
- Construction: Working in joined rounds, starting from a center ring and expanding outward
- Finished Dimensions & Sizing: Approximately 6 inches by 6 inches using standard worsted weight yarn
Materials & Supplies Needed
- Yarn: Worsted weight (#4), 100% acrylic or wool blend, approximately 25 yards per square
- Hook Size: 5.0 mm (US H-8)
- Notions: Tapestry needle for weaving in ends, sharp scissors
- Safe yarn substitutions: You can use DK weight yarn with a 4.0 mm hook for a smaller, tighter square, or bulky weight yarn with a 6.0 mm hook for a larger, quicker square. Note that changing yarn weight will change the final dimensions of your project.
Stitch Guide & Abbreviations (US Terms)
- ch = chain
- sl st = slip stitch
- dc = double crochet
- st/sts = stitch/stitches
- sp = space
- Cluster = A group of 3 dc stitches worked into the same space
- Magic Ring = A technique used to start rounds by crocheting into an adjustable loop
Step-by-Step Pattern Instructions
Granny Square Base
- Rnd 1: Start with a magic ring. Ch 3 (counts as first dc), work 2 dc into the ring, ch 2, 3 dc, ch 2 3 times. Join with a sl st to the top of the beginning ch 3. (12 dc, 4 ch-2 spaces)
- Rnd 2: Sl st into the next 2 sts and into the first ch-2 space. Ch 3, 2 dc in same space, ch 2, 3 dc in same space (first corner made). Ch 1, skip 3 sts, (3 dc, ch 2, 3 dc) in next ch-2 space 3 times. Ch 1, join with a sl st to the top of the beginning ch 3. (24 dc, 4 ch-2 corner spaces, 4 ch-1 side spaces)
- Rnd 3: Sl st into the next 2 sts and into the corner ch-2 space. Ch 3, 2 dc in same space, ch 2, 3 dc in same space. Ch 1, 3 dc in next ch-1 space, ch 1, (3 dc, ch 2, 3 dc) in next ch-2 corner space 3 times. Ch 1, 3 dc in last ch-1 space, ch 1, join with a sl st to the top of the beginning ch 3. (36 dc, 4 ch-2 corner spaces, 8 ch-1 side spaces)
- Rnd 4: Continue pattern by working (3 dc, ch 2, 3 dc) into every corner space and 3 dc into every ch-1 side space, with a ch 1 between each cluster. Join with a sl st to the top of the beginning ch 3. (48 dc, 4 ch-2 corner spaces, 12 ch-1 side spaces)
Finishing
Once you reach the desired size, fasten off your yarn, leaving a 6-inch tail. Use a tapestry needle to weave the tail through the back of the stitches to secure it. If you are making multiple squares for a blanket, leave the yarn tails long so you can use them to whip-stitch the squares together later.
Care & Washing Instructions
- Machine wash your finished item on a gentle cycle with cold water to prevent color bleeding.
- Lay the item flat on a clean towel to air dry, reshaping it into a perfect square while damp.
- Avoid using a tumble dryer, as high heat can damage the fibers and cause the square to shrink or lose its shape.
Pro Tips & Common Mistakes to Avoid
Maintain consistent tension by holding your yarn with a steady grip throughout the row. If your squares start to curl or look like a bowl, you are likely pulling your stitches too tight; try going up one hook size. Always place a stitch marker in the first stitch of every round to ensure you join the round in the correct place, as it is easy to accidentally skip the top of the chain. If you want to adjust the size of the square, simply repeat Rnd 4 until you reach your target measurement, keeping in mind that each additional round will require approximately 15-20% more yarn than the previous round.
Frequently Asked Questions
Can I use cotton yarn instead of acrylic?
Yes, cotton works well for this pattern, though it has less stretch than acrylic. Your finished square may be slightly stiffer, which is actually beneficial if you are making coasters or a structured tote bag.
What should I do if my corners are not sharp?
Check that you are working 3 dc, ch 2, and 3 dc into the same space. If you accidentally skip the ch 2, the corner will pull inward and the square will become round.
Are these squares suitable for selling?
You are welcome to sell physical items made from this pattern. We suggest checking the terms of the specific yarn manufacturer if you plan to use their branding, and always credit the pattern design.
Is this pattern suitable for a complete beginner?
This pattern is excellent for beginners because it only requires basic stitches. The most difficult part is often the magic ring, but you can substitute a ch 4 joined with a sl st to form a ring if you find the magic ring too difficult.
You now have a lightweight top that transitions well from morning coffee on the porch to an evening walk in the park. Try swapping the standard acrylic for a linen or bamboo fiber if you prefer a cooler drape for the hottest days of July. Sharing a photo of your finished work helps other makers find inspiration for their own yarn stashes. Head back to the main blog page to find additional seasonal designs and garment tutorials to fill your crafting calendar through the rest of the year.